Building a Compost Heap,
Step by Step Guide
So you want to make your own compost, that’s great. There are two types of compost heaps that you can create:
- “Slow” or “Cold” Compost Heap
- “Hot” Compost Heap
What’s the difference? Well, a cold compost heap will take around 1 to 2 years to make compost, whereas a hot compost heap if done correctly can make compost in 6 – 8 weeks.
Building a “Cold” Compost Heap
Equipment that you need for a Cold Compost Heap
- Bucket or container,
- rake for gathering leaves and other garden waste
- Shovel
- Wheelbarrow or Pull Cart
Building a Cold Compost Heap
Creating a cold compost heap is really quite simple, all you need to do is select a location where you want to create this heap.
Then you simply collect your grass clippings, leaves and pruning’s and stack it all into a pile on your chosen location. There you have it a cold compost heap, it really is that simple. Once you’ve built it, there’s little additional work. You can just keep adding to that pile more and more garden waste.
Your cold compost heap may develop a foul odour, if this happens just turn the pile to introduce fresh air into it.
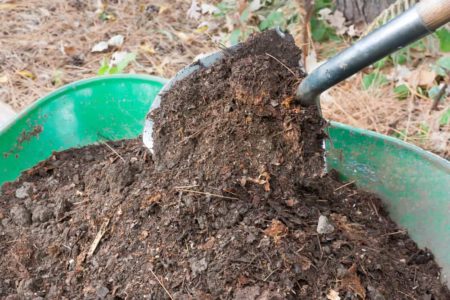
Your heap of garden debris will decompose (i.e., rot) in about 1 to 2 years. the material at the bottom of the pile, i.e., the yard waste that has been there the longest, should be compost. It should resemble crumbly soil with a rich smell.
At this point, you will need a shovel and a wheelbarrow or cart so that you can spread your compost on your lawn or garden.
Building a “Hot” Compost Heap
Equipment that you need for a Hot Compost Heap
- Bucket or container
- Rake for gathering leaves and garden waste
- Compost Bin or Compost Tumbler (not essential but strongly advisable)
- Garden hose of sufficient length
- Garden fork (4-pronged)
- Shovel
- Wheelbarrow or Pull Cart
A compost bin is not absolutely required, but I strongly recommend using one.
A child doesn’t have a to have a toy box, but if they don’t have one the toys are going to be everywhere all the time. A compost bin is helpful for the same reason. If you just pile organic wastes and leave them, the kids will run through it, the dogs will dig in it, the wind will blow some across the garden, and heavy rains will wash some away. Pretty soon, your compost heap is unrecognisable as a pile. A bin helps to keep all the waste contained.
Choose the Ideal Location
There are several key considerations in choosing a location for your hot compost heap:
Good Drainage. If water accumulates in the location that you choose, your pile will become anaerobic and stink. Aerobic bacteria (oxygen-breathing) will not have air to breathe in the water-logged portions of your pile, and the anaerobic bacteria (able to live without oxygen) will take over.
Adequate distance from wood structure. There should be at least 1 metre (3 feet) of open ground between your hot compost heap and any wooden structure such as a home, fence, storage shed, or garage. Never build your pile up against an untreated wooden structure. I will begin to rot along with the compost and bugs will chew on the structure. This separation rule also applies to a garden, if you have one.
Water source in close proximity. A hot compost heap requires moisture, so make sure the pile is located within easy reach of your garden hose.
Types of Compost Bins
Before buying or making your own compost bin please read this whole article first, this way, you are fully aware of how compost is made and what it takes.
When it comes to compost bins the choice is down to 2 things:
- Personal Choice
- Will it fit your needs?
Consider the available space you have, your budget, and how much waste your normally produce.
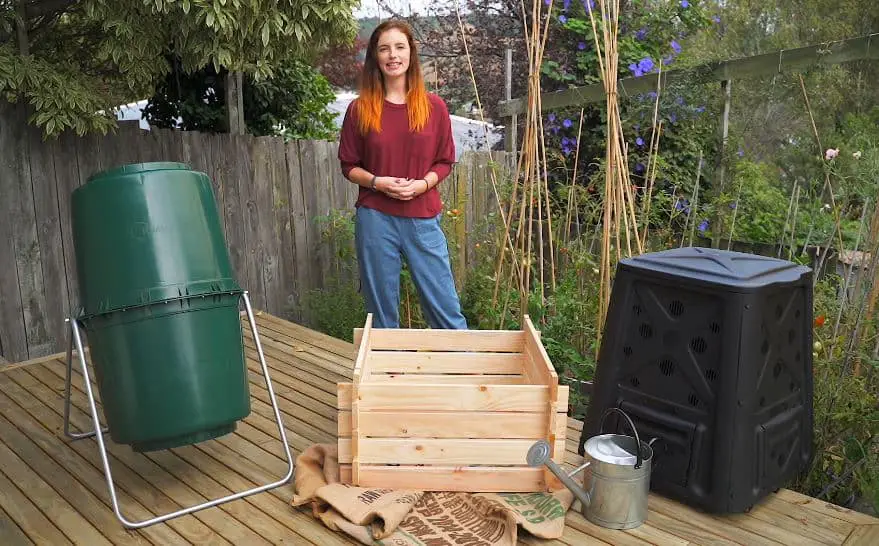
Compost Bins are available made from various materials, each with there own benefits and or drawbacks.
- Wood – looks nice, may rot if untreated.
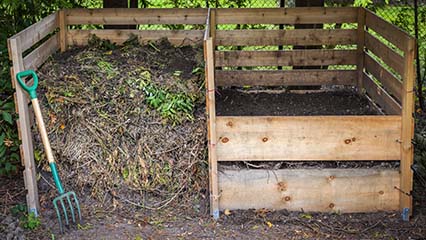
- Metal Wire – Allows air flow, but will it stop pests from getting to your pile?
- Plastic – Is it UV tolerant?
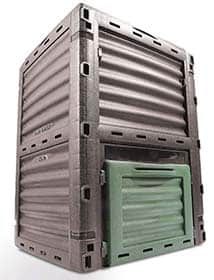
- Resin
- Concrete Blocks
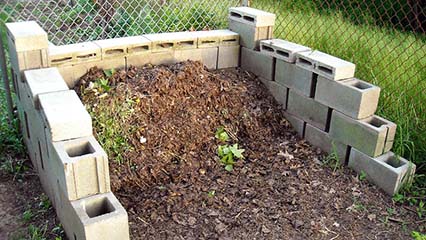
- Compost Tumblers
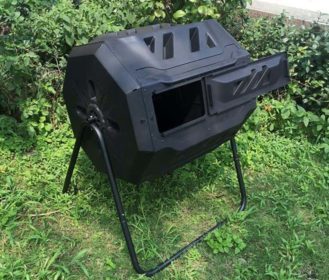
- Multi Chamber Bins
- Pest Proof
The ideal size for compost bin is 1 metre x 1 metre x 1 metre, bins smaller than this are less efficient.
Making your own compost bin is also a viable option and many people do make there own.
How To Compost
Every hot compost heap requires 5 tings to work.
- Water
- Air
- Warmth
- Time
- Correct Ingredients (Browns and Greens) (Carbon and Nitrogen) (Essentially this is food for microorganisms)
So what can we use as ingredients for our Compost Heaps ?
Appropriate compost ingredients are organic. Organic refers to matter that is a part of, or comes from, something that is (or was) alive. In other words, organic refers to plants, animals and their naturally-occurring by-products.
Compost Only Organic Materials
Nature has a cycle for animals and plants. When they die, they decay. Their decaying forms provide food for fungi and bacteria, which provide food for other microorganisms, which provide food for bugs, which provide food for frogs, which provide food for larger and larger creatures throughout the food chain.
Decomposing remains also provide nutrients and structure-building materials to the soil so that plants have a healthy, nutrient-rich environment in which to grow. Composting encourages this transformation from decay of dead forms into food for soil creatures and plants.
Inorganic materials do not decompose in this way and should be kept out of the compost bin.
DO compost appropriate organic waste:
- Shredded paper
- Grass clippings
- Leaves
- Horse or cow manure (any poop from a herbivore animal)
- Coffee grounds and filters
- Newspaper
- Tea leaves and bags
- Eggshells, crushed
- Hay or straw
- Garden wastes, flowers, yard trimmings
- Pine needles and cones
- Shredded cardboard
- Sawdust
- Nut shells, acorns
- Seaweed
- Peanut hulls
- Spent beer or wine
- Flat fizzy drinks or sports drinks (due to sugar content)
There are organic materials that should not be composted at home for various reasons including health, odour, and safety. These materials will decompose, but a home composting system is too small to address problems created as they decay. Effective composting of these materials generally requires the higher temperatures, professional monitoring, and odour control techniques of large-scale composting.
Do NOT compost inappropriate organic materials:
- Oil
- Grease
- Dairy
- Meat , Fish , Bones (attracts pets and animals)
- Cat, dog, or caged bird faeces
- Diseased plants
- Weeds that have gone to seed (actually, it’s the weed seeds you should avoid, the rest of the plant is OK)
- Road kill or dead animal
- Organic poisons like boric acid
- Rubber
- Coal, charcoal
- Human faeces (except in composting toilet systems specifically designed to handle this waste safely)
The Secret in a Healthy Compost Pile
The secret to compost heap is something called the Carbon to Nitrogen ratio, all the organic matter that we add to the compost heap is made up of carbon and nitrogen. All the ingredients have a higher amount of carbon than nitrogen, when composting the golden ratio, we looking for is 30 parts carbon to one part nitrogen. Known as 30:1
Because 30:1 is the optimal C:N ratio, we refer to materials greater than 30:1 (e.g. 40:1) as “carbons”. Materials less than 30:1 (e.g. 15:1) are referred to as “nitrogens”.
This formula has been developed by scientists as the quickest way to produce compost by the composting microorganisms
If you have too much carbon to nitrogen in your compost heap, decomposition slows down.On the other hand, if you have too much nitrogen to carbon in your compost heap you’ll end up with a stinky compost heap.
This is why organic matter added to your compost heap is classified into browns and greens, browns are high in carbon, greens have high amounts of nitrogen.
BROWNS (high in carbon)
- dried Leaves 60:1
- dry straw 75:1
- shredded paper, newspaper, tissue 100+:1
- sawdust, wood chips, shredded cardboard 300:1
GREENS (high in nitrogen)
- food scraps 20:1
- coffee grounds 20:1
- grass clippings 15:1
- manure 10:1
As you can see nearly all the material that we add to the compost heap doesn’t have the ideal 30 to 1 ratio, we have to balance them out by mixing ingredients.
If you add a handful of food scraps, you can balance that out by adding:
- one handful of dried leaves
If you add a handful of grass clippings, you can balance that out with either:
- a handful of shredded paper
- two handfuls of dried leaves
if you add a handful of manure then you can balance that out by either:
- adding three handfuls of dried leaves
- one handful of shredded paper and one of dried leaves
- one handful of sawdust
Before adding Carbons to your compost heap I would chip, chop, shred, or grind carbons that are more than 2.5cm to 5cm (1-2 inches) in size. You don’t need to shred nitrogen’s because they will compost quickly anyway. Chopping the size of the particles increases the surface area which bacteria may attack, therefore speeding the decomposition of the materials.
Building and Assembling Your Compost Heap
Now it is time to build the pile:
Wet the Ground Under the Heap (OPTIONAL)
(Only applicable if you are using an open bottom compost bin) Before you build a batch of compost, wet the ground under the heap. This will help prevent the ground from soaking up the moisture from the pile. It will also encourage earthworms to visit your heap.
Lay Twigs in the Bottom of the Bin for Aeration
Lay a 10cm (4 inches) layer of twigs or other coarse carbons on the bottom of the pile to allow air to circulate at the base.
Add Nitrogen and Carbon Materials in Alternating Layers while Adding Moisture
Layer the rest of your organic materials, alternating carbon and nitrogen layers. Add water as you go, remembering that 45 – 50% of the heap by weight should be water. Actually, it would be better for the materials to be completely mixed, rather than in layers. However, mixing them from the start makes it difficult to estimate the proportions. (If your using the above table then you don’t have to add ingredients in layers) Just make sure that your layers are no more than 10cm (4 inches) thick, thinner for fresh grass. This will allow most of the materials to come into contact with one of the adjacent layers. Bacteria will be able to access carbon and nitrogen at the same time. Once you turn the pile the first time, the carbons and nitrogen’s will be mixed.
End with a Carbon Layer
When the bin is almost full, make a final layer of carbon materials. Add water.
Cover the Heap
Experts disagree on whether a cover is necessary, so don’t feel obligated to use one. If you live in a area that is excessively dry or excessively wet, cover the pile with a black plastic garbage bag, bit of wood, or an old piece of carpet to retain moisture or guard against rain.
Monitor the Heap
You don’t have to check your pile. You can just forget about it until you want to add something else if you’re not in a hurry for compost.
Check to see that your heap becomes hot within a few days. You can use a compost thermometer, although some people just thrust their arm in the pile. A word of caution: Properly built, a pile will reach over 60°C (140°F).
Temperatures of 65.5°C (150°F) are good because they will kill pathogens and weed seeds, although I have heard experts quote lower figures of 60°C (140°F) and 55°C (131°F). If your compost heap does not reach 48°C to 71°C (120°F to 160°F), you probably do not have enough nitrogen in your pile. Add more nitrogen materials, mix, and monitor again. The minimum temperature should be 46°C (115°F).
Check Moisture
Also monitor the moisture content of your pile. It should be 50% water by weight. To check, pick up a handful of material. It should feel like a wrung-out sponge. There should be enough water that it almost, but not quite, drips when you hold up a handful.You done it, you have built your compost heap.
Congratulations
That’s it, your all done, you’ve successfully created your compost heap.
How to Maintain a “Hot” Compost Heap
Your compost heap temperature will continue to rise as long as abundant water and air are present in the heap. But as air and water are consumed, the supplies will become too depleted to sustain the aerobic bacteria population your heap needs. Your heaps temperature will drop as excess bacteria begin to die. Turning your hot compost heap at this point introduces air and water into the heap, reviving the bacteria population. Temperature rises again as aerobic bacteria reproduce more rapidly.
When to Turn the Compost Heap
Turning the heap also disturbs decomposers as they are shaken up and moved around, so don’t turn your heap more than necessary. The trick is to turn the heap just as the heap temperature starts to fall. If you have a compost thermometer, you can take daily readings and turn the compost heap when temperatures drop.
If you don’t have a compost thermometer, you can use the turning schedule from a typical heat cycle.
RULE OF THUMB
Turn the the compost heap every 4 or 5 days, do this for 4 or 5 times. Then turn it every 7 to 10 days until finished.
Turn your hot compost heap 4 or 5 days after it was built, and it will heat up again. Wait another 4 or 5 days, then turn again. Continue this pattern.
When the compost heap has been turned 4 or 5 times by this schedule, the choicest food is gone and natural volume reduction has reduced heap mass substantially. Compost heap conditions no longer support the types of bacteria that exist in high heat, so the heap temperature will remain fairly stable while it finishes composting. At this point, turn it every 7 to 10 days until it is finished.
Re-stacked, Not Stirred
For safety reasons, a pile should be re-stacked, not stirred. The pile will be wet and heavy. If you try to stand beside the bin and stir the pile, you could injure your back.
Inside Out, Outside In
Organic waste that has been heated in the centre of the compost heap will be more decomposed than materials at the outer edge of the compost heap because they have been better insulated. For the same reason, materials at the bottom of your hot compost heap will be more decomposed than materials that were at the top.
To keep all materials in the heap at the same stage of decomposition, they should each spend some time in the hotter portions of the heap. So when you turn your hot compost heap, try to move materials as follows:
- From the outer edges of the compost heap to the inside of the bin
- From the inside of the compost heap to the outer edges of the bin
- From the top of the compost heap to the bottom of the bin
- From the bottom of the compost heap to the top of the bin
Transfer all wastes into the compost bin, watering every 6-inches. Break up clumps of material that have matted together and water every 15cm (6 inches). The compost is ready for use when contents can be sifted through a 0.5cm (¼ inch) screen, or when it looks like rich, dark soil.
