Phalaenopsis orchid “Moth orchid”- Complete Care Guide
The moth orchid (phalaenopsis) is one of those cult house plants which almost everybody knows. A real, beautiful queen among indoor plants that can bloom in any season of the year.
Some hobbyists plant the moth orchid on a piece of tree trunk, which usually looks quite attractive, but can make it difficult to look after. The best idea is, however, to simply use a pot with a special substratum for orchids. This substratum consists of pieces of bark, between which the phalaenopsis’ roots can twine like on fragments of wood or a rock in the natural environment. Wide gaps between the pieces of bark allow the roots to be properly oxygenated and not to be at risk of staying in water which, after watering, quickly drains down through the pot.
Not a very demanding queen.

Keeping the orchid alive is generally no great trouble. Making it bloom abundantly is also not very difficult, but it needs a bit of experience.
While growing the phal the best thing is to remember what its life in its natural environment looks like and to try and provide it with similar conditions indoors. Of course, this rule is true of all plants, but in the case of the orchid it is of particular significance, because its natural conditions are quite specific.
The orchid doesn’t grow in soil, but on rocks or tree trunks, to which it clings with its thick green roots. Because the roots are not immersed in soil, they can’t take water in a continuous way using the moist layers of the ground. Access to water is only possible through rain, so not very regular.
The orchid has adapted to these conditions in two ways. Firstly, it uses its thick leaves and roots to collect a reserve of water which it can then use between rainfalls. Secondly, its natural habitat is the shady, humid forests of South-East Asia, thanks to which it isn’t at risk of drying out quickly.
Now you know what to do to provide the phal with the proper conditions: soil which doesn’t hold water for long; rare but abundant watering and a slightly shady spot.
Now, let’s get into the details.
Substratum and a pot
Unlike with the majority of flowers described by me where the substratum is not the most important thing, in the case of the moth orchid a proper substratum is a matter of the utmost importance ;-). As you already know, in its natural habitat the phal doesn’t grow in soil, so you shouldn’t place it in a pot filled with soil, because in conditions like this it will grow poorly, its roots can start to rot and it may even die.
Some hobbyists plant the moth orchid on a piece of tree trunk, which usually looks quite attractive, but can make it difficult to look after. The best idea is, however, to simply use a pot with a special substratum for orchids. This substratum consists of pieces of bark, between which the phalaenopsis’ roots can twine like on fragments of wood or a rock in the natural environment. Wide gaps between the pieces of bark allow the roots to be properly oxygenated and not to be at risk of staying in water which, after watering, quickly drains down through the pot.

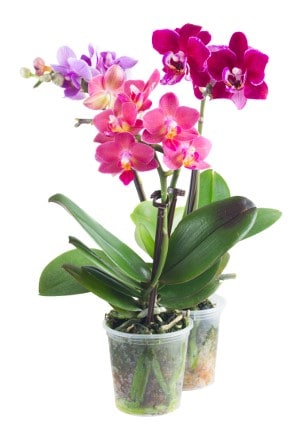
Usually, one places the orchids in clear plastic pots. There are two main reasons why it’s worth doing this. Firstly, it allows you to see if the roots are in good condition, are not sick and are not infested by pests. Secondly, you can always easily check to see if the substratum is dry and needs watering. Alleged benefits from photosynthesis by the exposed roots probably are probably negligible due to a much bigger participation of the leaves in this process.
Remember that the pot must have a hole through which the excess water can drain away. Standard orchid pots have one.
Watering
This is the most interesting and probably the most important thing relating to the growing of the phalaenopsis.
As I have already mentioned, in its natural habitat the orchid only has access to water when it rains. Only then can its roots, which are attached somewhere to a tree or a rock, be able to collect water.
How can you provide similar conditions in your home? Quite simply, this is the recipe:
- Pour some water into a bucket or bowl,
- Immerse the pot in which the orchid grows in it, and leave it immersed for about 15-30 minutes,
(optionally) Take the opportunity to wash the orchid leaves while its root clump is immersed in the water; thanks to this they will be cleaner and better moisturized, - Take out the pot with the plant and put it on a saucer,
- After about 15 minutes pour out any excess water that has drained down into the saucer.
Good, and now the question: “How often should I water it like this?”. Not very often. Usually, once a week. Before watering, always check if the bark in the pot has already dried throughout its entire depth in the pot. The colour of dry bark is light, you’ll easily recognize it. Watering too frequently can cause the roots to rot and, as a result, the plant to die.
Now a tiny remark. After the flowers fall, it’s worth giving the phal a few weeks’ rest (see the box “Blooming cycle and care”). When the plant is resting, limit watering to once every 2-3 weeks.
Feeding
Fertilizing the orchid is essential if we want to achieve abundant blooming. There are different opinions on when and how to fertilize the phal. I myself insert one or two special food spikes for orchids into the substratum about 3 months after the phalaenopsis has lost its flowers. Additionally, I pour some liquid fertilizer for flowering plants into the water in which I immerse the orchid roots. This method works and the plants bloom nicely.
Light
The moth orchid is not particularly light-loving. In its natural habitat it very often grows in the shadow of trees. This doesn’t mean, however, that you may place the flower somewhere in a dark corner a long way from a window. I mean, you may, but don’t expect your orchid to bloom in a place like this.
I keep my orchids on the windowsill of an east-facing window. It’s not a very strongly lit place, but on the other hand it’s bright enough for the orchid to be able to bloom.
In the period of rest after shedding its flowers, you can move the phal to a slightly darker place for about one month (see the section “Blooming cycle and care” below).
Air humidity
A high level of air humidity, at least 50%, has a very positive influence on the condition of the moth orchid. To guarantee a level like this, mist the phal, place it alongside bushy plants or use an air humidifier. Procedures like these are particularly important in the heating season in winter when the air humidity indoors is fairly low.
Temperature
The orchids grow well at room temperature between 20°C (68°F) and 28°C (82°F). Most sources advise the temperature at night to be lower than during the day by about 8°C (46°F), that is about 15°C (59°F). The day/night changes of temperature are supposed to have a good influence on the blooming of the plant. If you keep the phal on a windowsill and open the window just a crack at night, then you’ll achieve these changes in temperature without any extra work.
Cutting
After the moth orchid sheds its last flower, you can cut the flower spike just above the third or any higher node. This should stimulate the plant to sprout a new spike from this spot in the future. Sometimes, however, it doesn’t happen and the plant sprouts a completely new spike from its bottom. Anyway, flowers will appear.
Note that trimming flower spikes after they have shed their flowers is not absolutely necessary in order for the orchid to bloom again. Flowers can also appear on a spike which is left alone or even on a new shoot that will grow from the bottom of the plant.
Also note that it doesn’t mean anything is wrong if the spike dries out after shedding its flowers, sometimes it just happens like this. In such a case cut the spike off at its bottom.
Repotting
When several roots start to grow out of the pot, you can repot the orchid to a pot about 2 – 4 cm (1 – 2 in) bigger in diameter. Take the root cluster out of the pot, place it in the target pot and fill the space around it with substratum for orchids (bark pieces).
(If, after taking the orchid out of the pot, you can see some dead or dried out roots, cut them off.)
Propagation
You can propagate the phalaenopsis orchid by plantlets, so called keikis. These are little plants sprouting from one of the nodes of the flower spike (in Hawaiian the word keiki means ‘baby’).
Usually, you cut the flower spike above the third or subsequent node from the bottom to stimulate the plant to branch out in the node and to create a new flower spike. Sometimes, however, instead of a new flower spike, a new small plant starts to grow out (keiki). When this young plant grows a little and develops its own roots and leaves, then you can cut it off the spike of the mother plant and place it in a separate pot.

A young plant coming into being depends on the accumulation of a special growth hormone in the mother plant. It can happen naturally, or one can initiate the process artificially by using a paste with the proper hormone (keiki paste).
Pests and diseases
None of my phals has ever been sick or been infested by pests. It’s a really resistant plant. The most dangerous thing is watering too often, because it can make the plant roots rot and the plant itself die.
As far as pests are concerned, spider mites and scale insects are those which infest it most often. The chances that a plant will become a target for them are greater when air humidity is low.
You will find a lot of general information about the care of potted flowers in the post “The basics of house plant care”.
Blooming cycle and care
- Flowering – about 2 months (until the flowers drop) – keep the moth orchid in a bright place but not one in direct sunlight; water regularly (see watering) whenever the substratum becomes dry (usually once a week).
- Flowers have dropped – about 1-2 months of rest – cut the flower spike above the 3rd or 4th node from the bottom (optionally); move the flower into a darker place; water less frequently (every 2-3 weeks).
- Preparation to flowering – about 2-3 months – move the plant to a brighter place; water regularly whenever the roots are dry (usually once a week); add some fertilizer for flowering plants to the water every second watering; put an orchid food spike between the roots sometime in the middle of this period.
Appearance
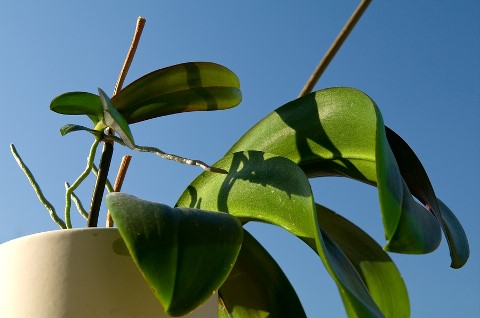
The phalaenopsis orchid is a plant with monopodial (single stem) type of growth. Stiff green leaves 5 – 65 cm (2 – 26 in) in length (depending on the variety) sprout from a short stem. The stem is practically invisible, hidden among the leaf bases.
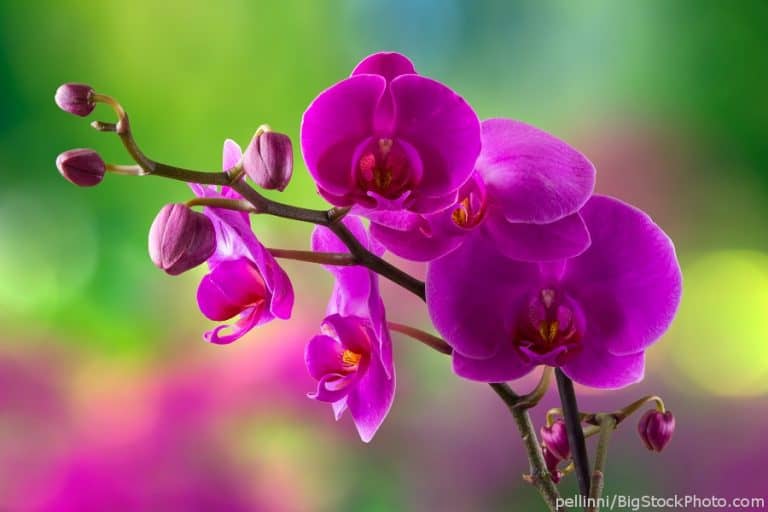
Every now and then a long (50-150 cm / 20 – 60” in the case of most varieties) stiff spike grows out of the stem. At its end a bunch of flowers appears, each in the shape of a butterfly (or moth).
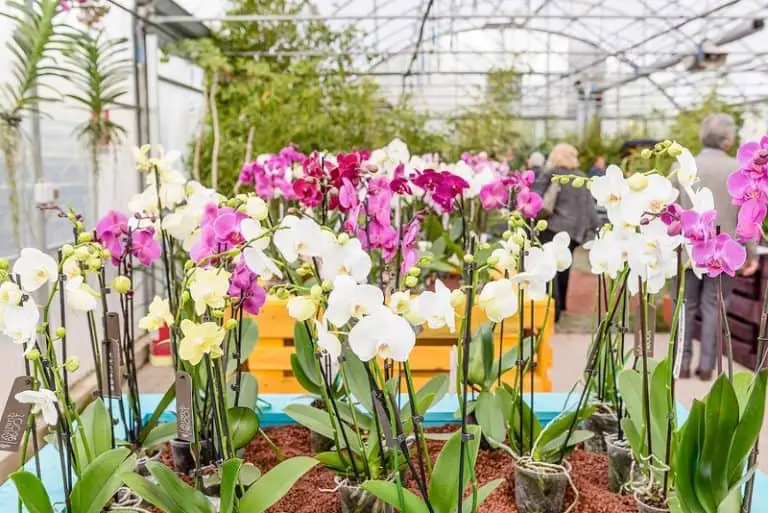
The colouring of the flowers is very rich, depending on the variety they can be white, pink, orange, yellow and also two-coloured, striped or dotted.
The roots of the plant are thick, silvery green.
There are many varieties of the moth orchid. Every year the manufacturers market new hybrids. They differ mostly in size and colour scheme.

Moth Orchid Origin
The phalaenopsis orchid comes from regions of South-East Asia.
The name ‘phalaenopsis’ was given to it in the year 1825 by a German-Dutch botanist Carl Ludwig Blume. It originates from Greek and means ‘similar to a moth’ (phalaena – moth, opsis – similar), probably due to the moth-like shape of its flowers.
